Sunday, March 25, 2012

Let's Talk Brownies: Time for a Bake Off!


"There are as many brownie recipes as there are flowers in the meadow" says Laurie Colwin (author of both fiction and nonfiction as well as a regular contributor to Gourmet  and New Yorker), as she introduced the recipe she claimed was Katharine Hepburn's Brownies in an article called "A Harried Cook's Guide to Some Fast Food" in 1992.  This article had actually originally been printed in The Ladies Home Journal in 1975. Well I'm not sure how many flowers one might find in a meadow, but I can tell you for sure there is no end in sight when looking for brownie recipes!


Brownies originated in Chicago at the Palmer House Hotel at the end of the 19th century by Mrs. Palmer who needed a dessert for the box lunches for women attending a fair at the hotel. It was from this beginning that the brownie began it's journey to it's current leading position on so many folks list of "favorites"!


Well I will assure you this is not an exhaustive look at brownies- but we are going to look at four recipes- and even do a blind taste test using both chocolate lovers- and non-chocolate lovers!  I do believe I found my favorite- we'll see how this one rates with our other "tasters"! I have to warn you here that we can't really say which is the REAL #1.  Our first testing compared the Katharine Hepburn "A" Brownies to Expresso Kahlua Brownies while our second testing compared the Katharine Hepburn "B" Brownies to Caramel Brownies.  That said we each came out with a favorite!


Most of us easily recognize the two major types of brownies-" cakey" or "fudgy".  Now since I really only like the "fudgy" rather than the "cakey" brownies- and since this is my blog- we're only going to focus on the "fudgy" ones.  So if you're a "cakey" brownie sort of person you're on your own! We'll look at two recipes claiming to have originated with Katherine Hepburn's family- you got it- two recipes!  And then we'll try an Expresso Kahlua Brownie as well as a Caramel Brownie!  I feel certain after reading this blog each of you will go straight to the kitchen and bake your own brownies!


Let's start with Katharine Hepburn "A" Brownies. The source of this first recipe is from a "Letter to the Editor" in the New York Times- (you can find the letter here) written by Heather Henderson, a graduate of Bryn Mawr, Katharine Hepburn's alma mater.  Ms. Henderson writes a lovely tribute to Ms. Hepburn that makes you love Ms. Hepburn- if you already didn't.  It seems that as a young girl Ms. Henderson was a student at Bryn Mawr- the same college that Katharine Hepburn had attended.  Ms. Henderson reports becoming so discouraged in her studies her senior year that she told her father that she was going to drop out of school.  Now it just so happened that her father shopped at the same small grocery in New York City that Ms. Hepburn also shopped.  Ms. Henderson's father asked Ms. Hepburn if she might talk to his daughter about her studies and Ms. Hepburn agreed- and promptly invited the young girl and her father to tea at her apartment.  Ms. Hepburn served brownies.  Ms. Henderson did not drop out of college.  She writes in this letter  that she learned three things from Katharine Hepburn- "Don't quit. Be yourself.  Never put too much flour in your brownies."  Ms. Hepburn gave the recipe to Ms. Henderson.


You can add nuts to any of these recipes though I didn't.  I have some chocolate lovers that love their chocolate straight!


So let's get cooking!


Katharine Hepburn's Brownies "A": Adapted from Baking: From My Home to Yours by Dorie Greenspan


Ingredients:
1 stick of butter
1/2 cup of unsweetened cocoa powder (I used Ghiradelli of course!)
1 cup of sugar
1 tsp of vanilla
1/4 tsp of salt
2 large eggs, beaten
1 cup pecans or walnuts, chopped (optional)
1/4 cup of flour


Directions:
Preheat oven to 325 degrees.  Line a 8 inch square baking pan- use metal- with either parchment paper or wax paper. Bring the paper up two sides to make it easier to get the brownies out. Butter and flour the paper.  


Whisk the flour and salt together.


Melt the butter over low heat on the stove top.  When the butter starts to melt, sift the cocoa onto the butter.  Stir until butter is melted and cocoa is well mixed into the butter. Set aside.


Whisk the eggs until light yellow in color.  Add the eggs to the butter/cocoa mixture.
Add in the sugar and vanilla.  Add the flour mixture- be real gentle with the mixing- you want to mix by hand (I used a rubber spatula)- and stop mixing when the flour has disappeared. 


Spread the mixture into the pan and bake for about 30 minutes.  Start checking after 20 minutes.  You really don't want to overcook brownies. If you happen to overcook them then cut the dry edges off and serve these as a "biscotti" with ice cream- and just cut the center of the brownies into squares.


Cool completely in the pan and then remove using the parchment or wax paper edges.  Cut into squares.


But brownies aren't just plain- often other ingredients are added for a different taste.  One of the most frequently mentioned "add-on" is coffee. Coffee actually enhances the flavor of the chocolate.  The next brownies are a more "grown-up" brownie!


So let's gather the ingredients!


Expresso Kahlua Brownies: Adapted from a food blog, Baker Street


Ingredients:
1 stick of butter, cut into pieces
3 ounces of chocolate ( I used 60% Cocoa)
2 eggs
1 1/4 cups of sugar
1 tsp of vanilla
3 Tbsp of instant espresso powder
2 Tbsp of Kahlua or other coffee-flavored liqueur
1 cup of pecans or walnuts, chopped (optional)
3/4 cup of flour
1/2 tsp of baking powder
1/4 tsp of salt


Directions:
Preheat oven to 350 degrees.  With brownies you want to use a conventional oven setting rather than the "convection" setting if your oven has this setting.  The "convection" setting creates more even heating so the brownies won't develop the crusty exterior and the gooey interior- the perfect texture for a brownie.


Grease and flour a 9 inch cake pan.


Whisk together dry ingredients (flour, baking powder and salt)


Melt butter and chocolate in a sauce pan over low heat.  


In a large bowl (I used my Kitchenaid stand mixer), mix well the eggs, sugar, vanilla, espresso powder and Kahlua. Add in the chocolate mixture.  Last, gently add the flour mixture being careful not to overdo this.  Stop when you no longer see "white"!


Spread the mixture into the pan and bake for 30 minutes. Again do check beginning at 20 minutes so you don't over bake.  


Cool completely before cutting into squares.


Since I was traveling to Florida with these brownies, I layered them in a plastic container separating each layer with wax paper.  Kept this way brownies will last up to a week.  Brownies can also be frozen for up to 3 months if anyone can resist eating them before any thought is given to freezing them!


But just two recipes for brownies didn't seem enough- not given the abundance of "flowers in a meadow", so when I returned from Florida it was back to baking! Besides, Brandy and Will were to arrive from Florida (we were watching Mikayla while they went house hunting in Michigan) so they could be taste testers for two more renditions of brownies!


I was especially interested in the other brownie recipe attributed to Katharine Hepburn.  So we're back to Laurie Colwin and her article "A Harried Cook's Guide to Some Fast Food" from her book, More Home Cooking. The article that appeared first in The Home Journal before it was later published in Gourmet. This recipe had traction!  In this brownie recipe rather than using cocoa, chocolate is used.  I rather like this recipe because it is so, so, so, so easy- and so, so, so, so chocolately!  If you want perfect brownies, but don't want to work so very hard- this is the recipe for you. 
We'll end this brownie match-up with a "layered" caramel brownie. And who of course can resist a Caramel Brownie!


So let's get started!


Katharine Hepburn's Brownies "B": Adapted from "A Harried Cook's Guide to Some Fast Food" by Laurie Colwin


Ingredients:
1 stick of butter
6 ounces of chocolate (I used a mixture of 70% as well as semi-sweet)
2 tsp of vanilla
1/4 tsp of salt
1 cup of sugar
2 eggs, beaten
1 cup of pecans or walnuts, chopped (optional)
1/2 cup of flour


Instructions:
Preheat oven to 350 degrees.


Line a 9 inch aluminum pan with parchment paper- or aluminum foil. Grease and flour the pan.


In a saucepan melt the butter and chocolate together.  When completely mixed, stir in the vanilla, the sugar and the salt.  Mix well.


Add in the eggs.


Finally, add in the flour. Remember- don't overdo this. Stop when you don't see "white".


Spread into the pan. and bake for 30 minutes (again begin to check after 20 minutes so that you don't overcook).


Cool completely in the pan before removing from the pan and cutting into squares.


The final brownie was a Caramel Brownie- rather like a caramel sandwich-  layer of caramel sandwiched in between two layers of brownie.


So let's get started!


Caramel Brownies: Adapted from the food blog, Annie's Eats.

Ingredients:


For the Brownies(Notice that these are the same brownies as Katharine Hepburn's "B".)
1 stick of butter
6 ounces of chocolate  (Again I used a mixture of 70% and semi-sweet- the chocolate I had on hand- feel free to use your favorite!)
2 tsp of vanilla
1 cup of sugar
1/4 tsp of salt
2 eggs, beaten
1/2 cup of flour


For the Caramel:
7 ounces of caramels
1/2 cup of pecans or walnuts, chopped (optional)
1/6 cup of heavy cream


Directions:
Preheat the oven to 350 degrees.  Line an 8 inch cake pan with parchment paper or aluminum foil.


Melt the butter and the chocolate in a saucepan over low heat.  Add in the vanilla, sugar and salt. Mix well.  Add in the eggs. Again, mix well.  Finally, add the flour, mixing only until you no longer see white.


Spread half of the mixture into the pan and bake for 15 minutes.


Melt the caramels with the cream.


Cool the bottom brownie while you melt the caramels. 


Spread the caramel mixture over the bottom brownie.


Top the caramel layer with the rest of the brownie mixture.


Bake the Caramel Brownies for 15-20 minutes. Again watch carefully so that you don't over cook- the idea is to get "soft, gooey" brownies. And these brownies will always win the "soft, gooey" award!


Now let's reveal how the brownies where rated by our tasters.  In our "LOVE CHOCOLATE" group were Brandy, Will and Becca (Becca is our delightful next door neighbor- home for spring break from her freshmen year at Ohio State University).  In our "DON"T LOVE CHOCOLATE" group were Don, Ann and Mark Lampe (our neighbors, the parent's of Becca).  Brandy, Will and Don definitely picked the Caramel Brownies, though they remained fond of the Espresso Kahlua from the first test.  They loved the "gooey" texture of the Caramel Brownies as well as the taste.  For Ann and Mark the favorite was the Espresso Kahlua Brownies from our first taste, though in the second taste they definitely preferred the Caramel Brownies.  Now Becca likes her brownies less "adorned" and choose the Katharine Hepburn "B" Brownies.  


As for me- well that is a lot of brownies to mix and taste.  And I have to admit I'm rather influenced by how easy it might be to "whip" up a batch of brownies on a whim.  With that criteria I have to say I'm with Becca.  Katharine Hepburn "B"!  Try them all- and see which one you like!


Enjoy!


Sunday, March 11, 2012

Soups On!: Italian Sausage with White Beans and Spinach


I really don't cook soups as often as I might- or especially as often as we would like to eat them.  And of course they are perfect in winter.  I thought that I might just tuck in a favorite before winter is over completely and we are firmly into spring.  This soup is perfect for any winter- or spring for that matter- night- and there's always plenty to save for later!


The foundation for this soup is the Italian Sausage!  Even though there are spices a plenty- the magic in this soup is a GREAT Italian Sausage.  


The outcome of any recipe is the quality of the ingredients with which you begin.  This is true with chocolate- vegetables- cheese- and certainly for meat!


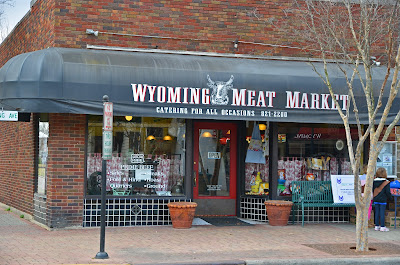
We get all of our meat from our local meat market- the Wyoming Meat Market!  The Italian Sausage we use in this soup is Jim's very own!  It's my "go to" meat for Italian "Stir Fries", Italian Beans and Kale, Pizza... 
But with meat it's not just about taste.  With meat, paying attention has a lot to do with the humane treatment of animals.  Jim only buys his meat from small farms in Ohio- humane farms- farmers that care for their animals as well as their end product!  Thanks Jim!


So let's gather our ingredients and get started!


Ingredients:


2-3 Italian Sausage- sliced (Can substitute Chicken Sausage- or for vegetarians leave out the meat entirely)


1 onion- diced
6 clove of garlic- minced
4-6 cups of spinach
1 green pepper-diced
1 yellow pepper-diced
1 red pepper-diced
1 fennel bulb-diced


2 large cans of Cannellini  beans (white kidney beans)
1 large can of crushed tomatoes


2 Tbsp of olive oil


1 Tbsp of anchovy paste (optional)
2 Tbsp of Italian Seasoning (Can also substitute combination of basil, thyme, oregano, rosemary)
Salt/Pepper
Red Pepper Flakes to taste (And for Don this can require a real heavy hand!)


Directions:


In large dutch oven (I used my new enameled cast iron), heat olive oil and when hot add onion.
Cook until onion is softened.


Add Italian sausage and garlic.  Cook until sausage is browned.


Add peppers and fennel.  Cook until slightly softened. 


Mix in anchovy paste.


Add beans- don't drain- and crushed tomatoes.  


Bring to soft boil.


Add spinach and seasonings.


Lower the heat till soup just simmers.  You may also move the soup to the oven heated to 300 degrees if you need to leave soup unattended.


And as with any soup- the longer it simmers the better the flavor!  Don't hesitate to add water (or vegetable broth) if it gets too thick during the simmering process!


Serve!


Enjoy!


Sunday, March 4, 2012

Company Cake: Chocolate Of Course!


Of course we all know that Don does not have a very high opinion of all things chocolate- much preferring apples- or rhubarb- or most assuredly cinnamon in his deserts- not that he's much of a "dessert" person actually.  But Don is definitely in the minority here.  I should probably acknowledge that Don is often in the minority when it comes to opinions (his is always the right one of course!)- and Don rather enjoys this position in the minors!  

But if you need a "Company Cake" then I go with chocolate- a crowd pleaser for sure! So since we were having company, chocolate it was!  Now this recipe is the first in a "series" of chocolate cake recipes- though not sure how long this "series" will take to complete- that are all totally dependent on "company".  But for sure I'd like to explore other chocolate cakes- such as the flourless- and the "sheet"- but for this dinner party the cake was simpler- and easily adorned with ice cream- Graeter's of course! 

Now before I start talking about this particular cake I want to talk just a bit about all things chocolate in general. Chocolate has been around a long, long time- since 1100 B.C. for sure! And traveled up to North America from South and Central America. Chocolate actually played a central role in Mayan and Aztec religious ceremonies. It was given as a gift to the fertility goddess! It was the Europeans who added the sugar and fat and placed it squarely in the dessert category in the late 1600s/early 1700s!

Now the most important decision you're going to make whenever cooking with chocolate is both brand and type.  These two decisions are absolutely central to the result you're going to get when cooking with chocolate.  I use Ghirardelli Chocolate exclusively.  Ghirardelli- originating in San Francisco near Fisherman's Wharf in 1852- is the oldest chocolate factory in America- and the only one that controls the production process from start to finished product!  


Next you have to decide which choice of "chocolate" you are going to use.  Though most recipes specify which chocolate to use you actually have some freedom of choice here- and if you know your chocolates you can select the "chocolate" that best matches your own taste buds!  Unsweetened chocolate (also called Bittersweet) is the chocolate for "adult" tastes.  It's available from 100% to 60%.  I usually use 70% because that's what's most readily available to me.  Bittersweet chocolate will definitely need some "sweetening" for a dessert!  Bittersweet chocolate contains cocoa solids, and cocoa butter that is then diluted with sugar (thus the 100%, 70%, 60%).  Semi-sweet chocolate is even less cocoa solids and butter and more sugar.  Milk chocolate (probably the preferred chocolate for children because it has the least "bite") adds in milk products- and usually contains around 20% cocoa solids and butter.  I like the "rich" taste of the chocolates with more chocolate and less sugar when cooking- but in cooking with chocolate always feel free to select the chocolate that best suits your own taste buds!  White chocolate contains only cocoa butter, sugar and milk- no cocoa solids at all- and is not even considered chocolate in some countries.  I really don't like the taste so seldom use it! 

So lets get to cooking!  Of course first things first- let's gather the ingredients!


Company Chocolate Cake (Adapted from Taste of Home Chocolate Ganache Cake):

Ingredients:

2 ounces 60-70% Ghirardelli Baking Chocolate
2 tablespoons of Butter
3/4 cup Boiling Water
2 teaspoons of Espresso Instant Coffee
1 tablespoon of Amaretto Liqueur
3/4 cup of Sugar
1/4 cup of Buttermilk
1 Egg
1 teaspoon of Vanilla Extract
1 cup Flour
1 teaspoon of Baking Soda
1/2 teaspoon of salt

Ganache:
1/4 cup of half and half
3 ounces Ghirardelli Baking Chocolate , coarsely chopped

Directions:

Preheat oven to 350 degrees.

Grease and flour a 9 inch round cake pan.  I also lined mine with parchment paper I had cut to fit.  (If you use parchment paper, first butter the bottom of the pan, then place the parchment paper on top, and then butter the top of the parchment paper.)

Place chocolate, butter, espresso instant coffee and Amaretto in large bowl.  Add boiling water and stir until smooth.  
Stir in sugar, buttermilk, egg and vanilla (I used my stand mixer and made sure that this mixture was very, very smooth!).
Combine the dry ingredients (flour, baking soda and salt).  Beat into the chocolate mixture just until blended.  Don't over mix at this point!

Bake for 18-22 minutes.  Don't overbake!  Toothpick inserted into center should come out clean.  Cool the cake for 10 minutes in the pan before cooling on a wire rack.


For Ganache:

Place a stainless steel or glass bowl over a saucepan of boiling water. Melt the chocolate into the half and half. Whisk until smooth.


Cool for ten minutes.
Slowly pour Ganache over cake, allowing some Ganache to drape the sides.


Serve with Graeters Raspberry Chip Ice Cream!


ENJOY!


Thursday, March 1, 2012

Susan's Chicken Pot Pie


Last fall I made a trip to Oklahoma for the 40th Anniversary of University of Oklahoma College of Nursing Class of 1971.  I had an ABSOLUTELY AMAZING time from start to finish.  On my way to Oklahoma I stopped off for a night in St. Louis with a college roommate who then went on to the reunion with me.  For dinner she served her very own Chicken Pot Pie.  IT WAS WONDERFUL!  I first went back for seconds- and savored that- and then as if I was never to eat again I went back for thirds and finished that as well.  I loved it.  Fortunately for me Susan had made a large Chicken Pot Pie.... Unfortunately for Paul, Susan's very gracious husband who was supposed to be eating this Chicken Pot Pie during Susan's trip to the reunion, I didn't leave much behind! I begged for the recipe- and Susan being just as gracious as her husband sent the recipe to me after I returned home to Cincinnati. I found the "secret" ingredient to this Pot Pie that makes all Pot Pies pale in comparison- FENNEL.  You got it right- FENNEL.


While Susan gives credit to the Barefoot Contessa for  the origin of the recipe, when I searched through several varieties of Pot Pie that the famed Contessa has posted (or others have posted in her name) only the vegetarian one included fennel.  So this pie belongs to Susan! 


Now I can't swear that my Chicken Pot Pie was as good as the one so beautifully prepared by Susan, but I can swear this is the best Chicken Pot Pie I have ever made!


So let's get started by gathering the ingredients and start cooking!


Susan's Chicken Pot Pie:


Ingredients:


Chicken for Roasting: 2 breasts, 2 thighs and 2 legs- Bone in/Skin on (You may substitute a "store bought" rotisserie chicken if you wish to save time.)


1 large Onion, diced
2 stalks of Celery, diced
1 Fennel bulb, diced
6 cloves of Garlic, diced or crushed
3-4 cups of Mushrooms, sliced (Increase to 6 cups if making a Vegetarian Pot Pie.)
4 Carrots, diced
1 cup Peas, frozen


1 1/2 sticks of Butter
2 1/2 cups of Chicken or Vegetable Broth
1/2 cup of Flour
1/4-1/2 cup of Half and Half (You may substitute milk or cream for this.)


2 tsp of fresh Thyme
2 tbsp of fresh Parsley
Salt and Pepper to taste


Pastry (from Barefoot Contessa)
3 cups of Flour
1 1/2 tsp of Salt
1 tsp of Baking Powder
1/2 cup of Crisco Butter Flavored Shortening
1/4 cup of Butter
1/2 to 2/3 cup of Ice Water
Whipped Egg White for Egg Wash
(You may substitute "store bought" pastry crust- in refrigerator case- or puff pastry- in freezer case- if you'd like.)


Directions:


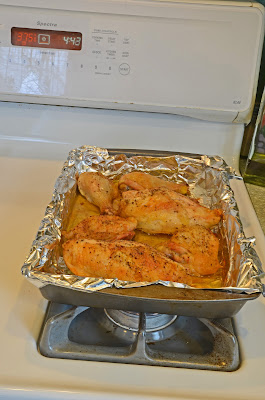
Preheat Oven to 375 Degrees.  Toss chicken pieces with olive oil and salt and pepper.  Roast for an hour or until done. Cool chicken until able to remove skin and bone and then shred into small pieces.


Prepare crust:
Place flour, salt and baking powder in food processor.  Cut shortening and butter into small pieces.  Add to flour mixture and with fingers mix until all shortening and butter pieces are coated in flour.  "Pulse" food processor until shortening/butter pieces are the size of small peas.  Slowly add ice water until dough clings together well enough to roll out the crust.  Remove the crust from the food processor and form into small dome.  Wrap in plastic wrap and chill in refrigerator for AT LEAST 30 minutes.  


Preheat the oven now to 400 degrees.


Mix the flour and the broth in a blender until well blended- set aside.
Melt butter in large skillet.  Add onion, celery, garlic, carrots and fennel.  Cook until onion is translucent and carrots are softened.  Add mushrooms and cook until soft. Pour in flour/broth mixture and stir constantly to thicken.  Add peas and chicken. Add Half and Half (or milk or cream) Season with thyme, parsley, salt and pepper to taste.


Place mixture from skillet in 2 quart casserole pan. (Because I was just cooking for Don and me I used two small "pot pie" size baking dishes and only about half of the contents- and am saving the rest in the freezer for another time.)


Brush the top 1/2 inch rim of the outside of the casserole with egg wash (this is an egg white that has been "whisked" with a tbsp of water) so the crust will not "stick" to the dish.  Place the crust on top with about 1/2 inch draping the sides of the dish.  Brush the crust with the egg wash (this makes the crust "shiny"). 


Bake for about an hour- until the crust is browned an flaky!


Serve with a tossed side salad if desired- though it certainly can "stand alone"!


ENJOY!